How To Send Device-To-Cloud Messages to Azure IoT Hub
In my last article IoT Hub Provision, we had provisoned a IoT Hub and a device, now will ‘Send device-to-cloud messages’ from following message communication methods:
- Send device-to-cloud messages.
- Receive cloud-to-device messages.
- File uploads.
- Retrieve and update device twin properties.
- Direct method.
There are many industries now a days using IoT solutions to automate their business to reduce the time. Examples of telemetry received from a device can include sensor data such as humidity or temperature, an error message such as missed event, or an information message to indicate the device is in good health. IoT devices send events to an application to gain insights.
Below is a sample Azure IoT solution architecture flow diagram which shows how sensors data sends to cloud and that data we can process through the backend application and imvrove the business process to use that data.
I am assuming that you have created a IoT hub and a device which I shown you in last article.
Let’s doing practicle step by step.
Step 1. Open the VS Code, click on extension icon-> Search Azure IoT Hub -> Click on Azure IoT Hub and install it, I aready have install that is why its showing uninstall.
Step 2. Now we need to loged in into azure account from vs code, so click on azure icon, you will get option to login azure account, give input your user id and password to login.

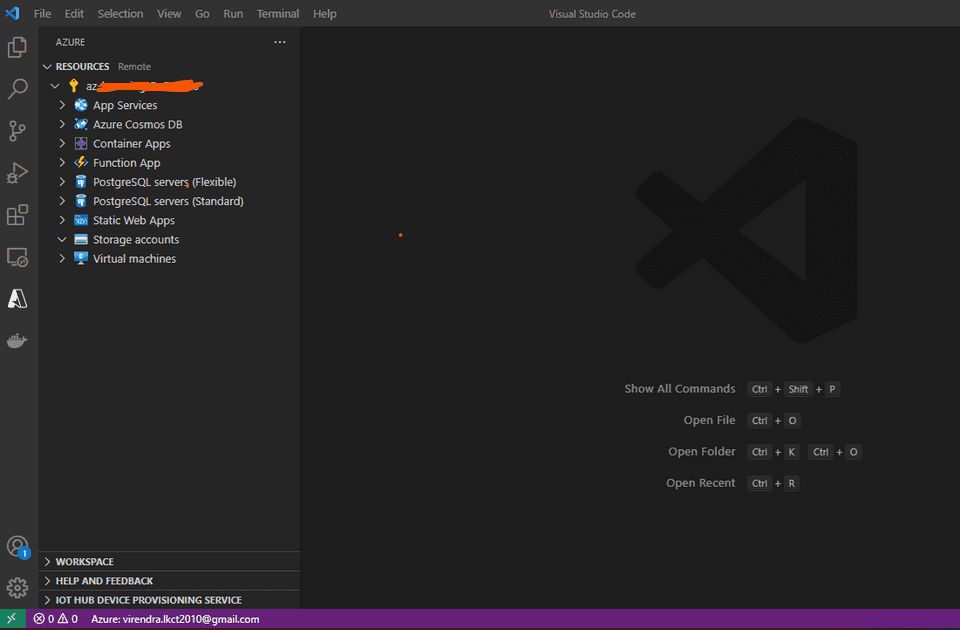
Step 3. After successfuly logged in into azure account from vs code, you will get populated your azure subscription and resources names which you can manage from vs code itself.
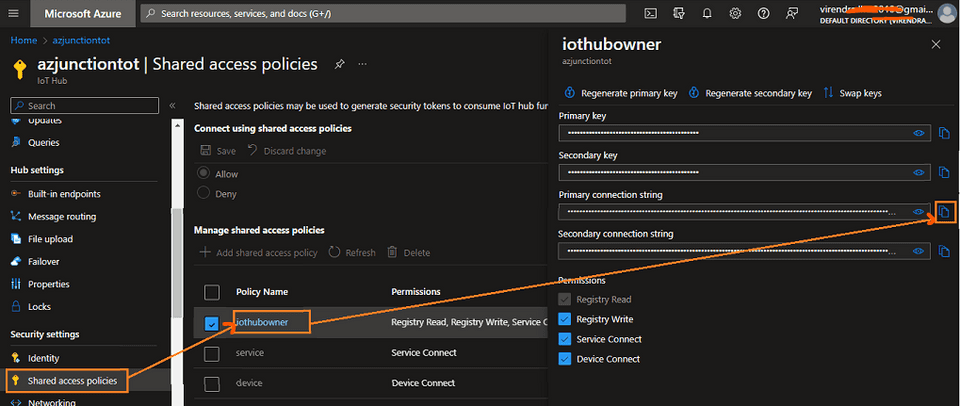
Step 4. Now go to azure portal and click on IoTHub which you already have-> click on Shared Access Policies-> Click on iothubinwer-> copy the primary connection string and keep it somewhere to use in further step.
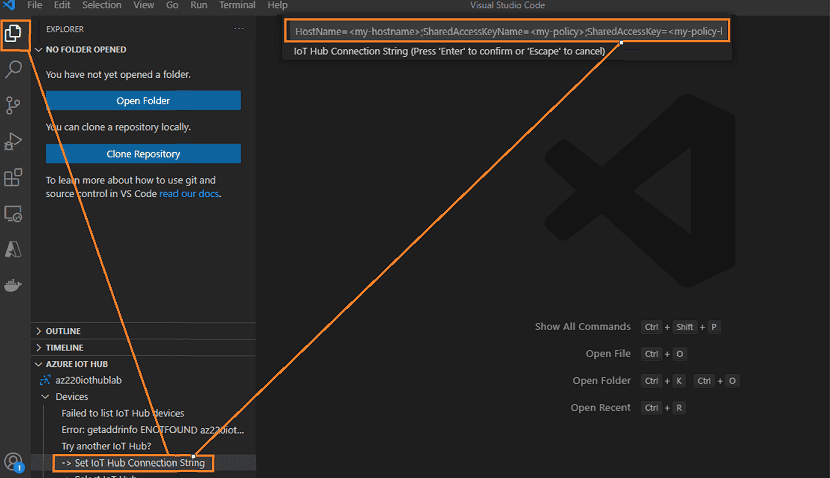
Step 5. Click on the explorer icon-> expand the Azure IoT Hub panel-> expand the devices panel-> Click on the ‘Set IoT Hub Connection String’ and on the top put the connection string which you have copied in step 4 and hit enter button. Now your IoT Hub and device will show inside Azure IoT Hub panel.
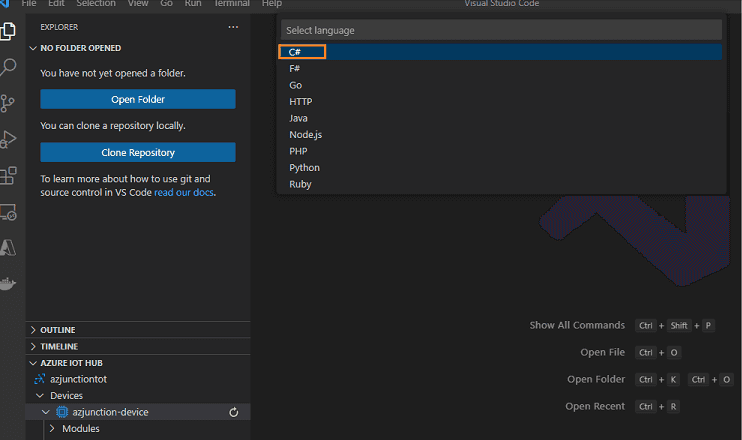
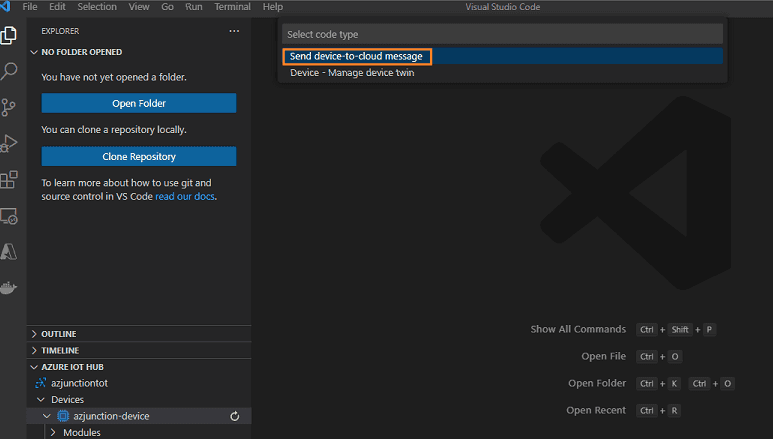
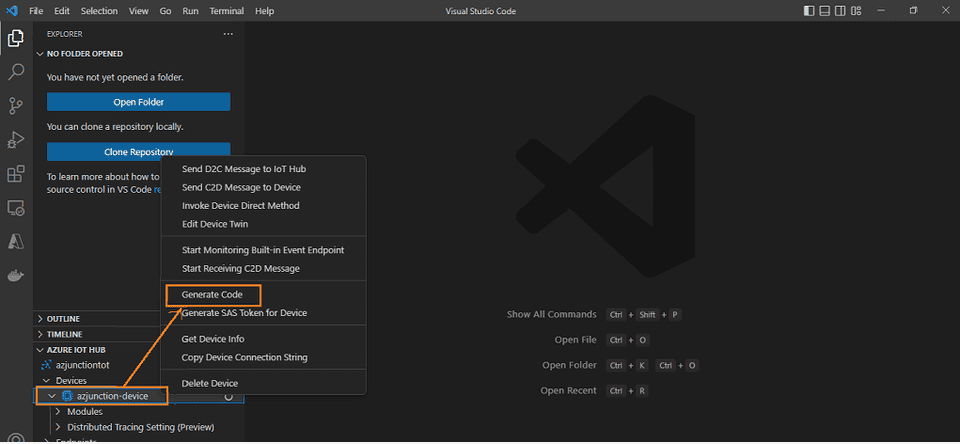
Step 6. Right click on the device name azjunction-device and click on the gererate code option-> on the middle top select the c# as this is my preferred langauage-> select the send device-to-cloud message. Now one popup will came up to select to keep the generated code, so you can select existing folder or create new one, I have selected IOTHUBD2C folder from my local machine.
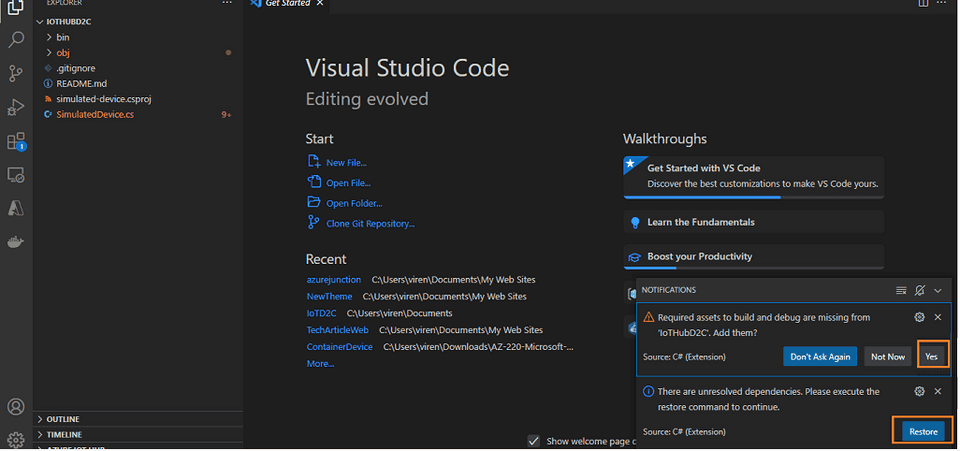
Step 7. There will some pop-up on right botton to resove the dependencies, you can click according yes and restore, if still there is build error in the code, open the terminal and execute the dotnet restore command that will restore the dependencies.
Also there are two files where i have changed the dotnet core version 2.1 to 3.1 as my machine has 3.1
a. simulated-device.csproj
<Project Sdk="Microsoft.NET.Sdk">
 <PropertyGroup>
   <OutputType>Exe</OutputType>
   <TargetFramework>netcoreapp3.1</TargetFramework>
 </PropertyGroup>
</Project>
b. launch.json
"program": "${workspaceFolder}/bin/Debug/netcoreapp3.1/simulated-device.dll",Now you can see below code for sending message device to cloud in SimulatedDevice.cs which is very straight forward and self explanatory.
class SimulatedDevice
{
    private static DeviceClient s_deviceClient;

    // The device connection string to authenticate the device with your IoT hub.
    private const string s_connectionString = "HostName=azjunctiontot.azure-devices.net;DeviceId=azjunction-device;SharedAccessKey=xxxxxxxxxxxxxxxxxxxxxxxxxxxx";

    // Async method to send simulated telemetry
    private static async void SendDeviceToCloudMessagesAsync()
    {
        // Initial telemetry values
        double minTemperature = 20;
        double minHumidity = 60;
        Random rand = new Random();

        while (true)
        {
            double currentTemperature = minTemperature + rand.NextDouble() * 15;
            double currentHumidity = minHumidity + rand.NextDouble() * 20;

            // Create JSON message
            var telemetryDataPoint = new
            {
                temperature = currentTemperature,
                humidity = currentHumidity
            };
            var messageString = JsonConvert.SerializeObject(telemetryDataPoint);
            var message = new Message(Encoding.ASCII.GetBytes(messageString));

            // Add a custom application property to the message.
            // An IoT hub can filter on these properties without access to the message body.
            message.Properties.Add("temperatureAlert", (currentTemperature > 30) ? "true" : "false");

            // Send the tlemetry message
            await s_deviceClient.SendEventAsync(message).ConfigureAwait(false);
            Console.WriteLine("{0} > Sending message: {1}", DateTime.Now, messageString);

            await Task.Delay(1000).ConfigureAwait(false);
        }
    }

    private static void Main()
    {
        Console.WriteLine("IoT Hub Quickstarts - Simulated device. Ctrl-C to exit.\n");

        // Connect to the IoT hub using the MQTT protocol
        s_deviceClient = DeviceClient.CreateFromConnectionString(s_connectionString, TransportType.Mqtt);
        SendDeviceToCloudMessagesAsync();
        Console.ReadLine();
    }
}
Step 8. Now hit the F5 to run the code and magice happens, you will see the messages sending to IoT Hub Default endpoint that is eventhub, there are 5 type custom endpoint routing as well which we will learn in upcoming articles.

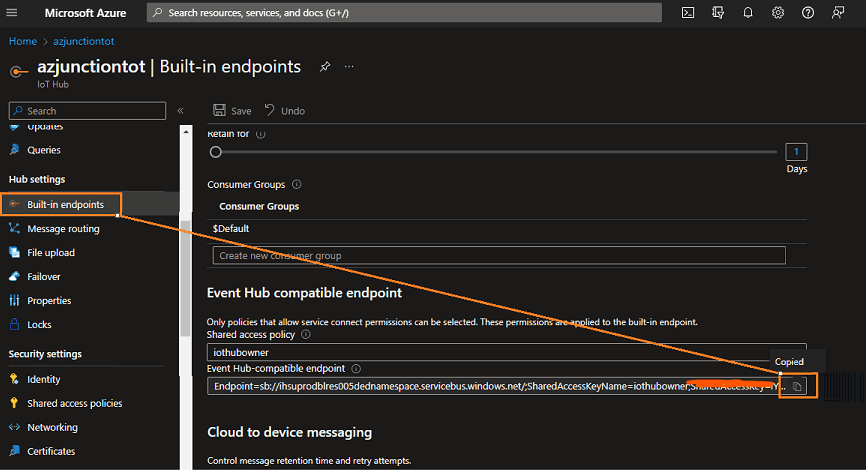
Step 9. Go to azure portal, click on build-in endpoints and copy the eventhub connection string to monitor the messages which we have sent to iot hub in step 8.
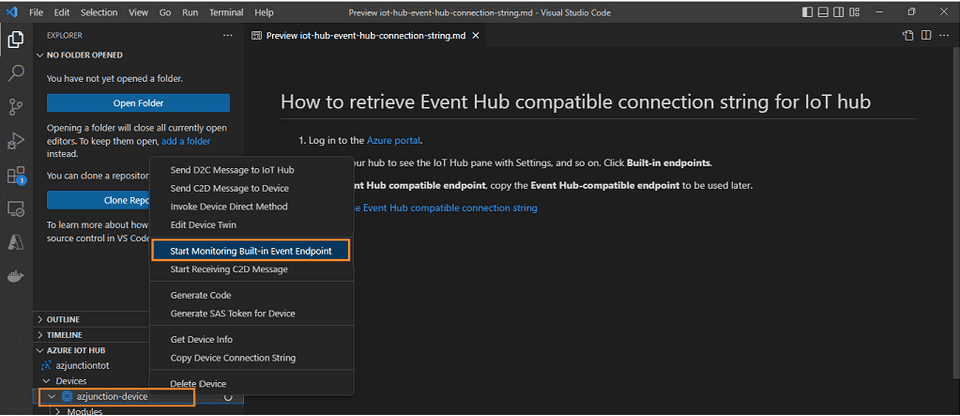
Step 10. Initiate the one more instance of visual stusio code-> expand the azure iot hub panel-> expand the devices panel-> right click on the device name azjunction-device-> click on ‘start monitoring build-in endpoint’-> put the connection string which you have copied in step 9.
Step 11. And magic happens, you will start receiving the messages which you are sending from another instance of vs code.

I hope this article will help you:-)


